

Node anatomy
Every node shares the same shape: a header with the type icon and name, the content area where the result appears, connection handles on the left (input) and right (output) edges, and a prompt bar with a Run button at the bottom. The ⋮ menu in the top-right corner holds per-node actions, and the pills around the prompt bar hold that node’s generation settings — aspect ratio, resolution, duration, and so on.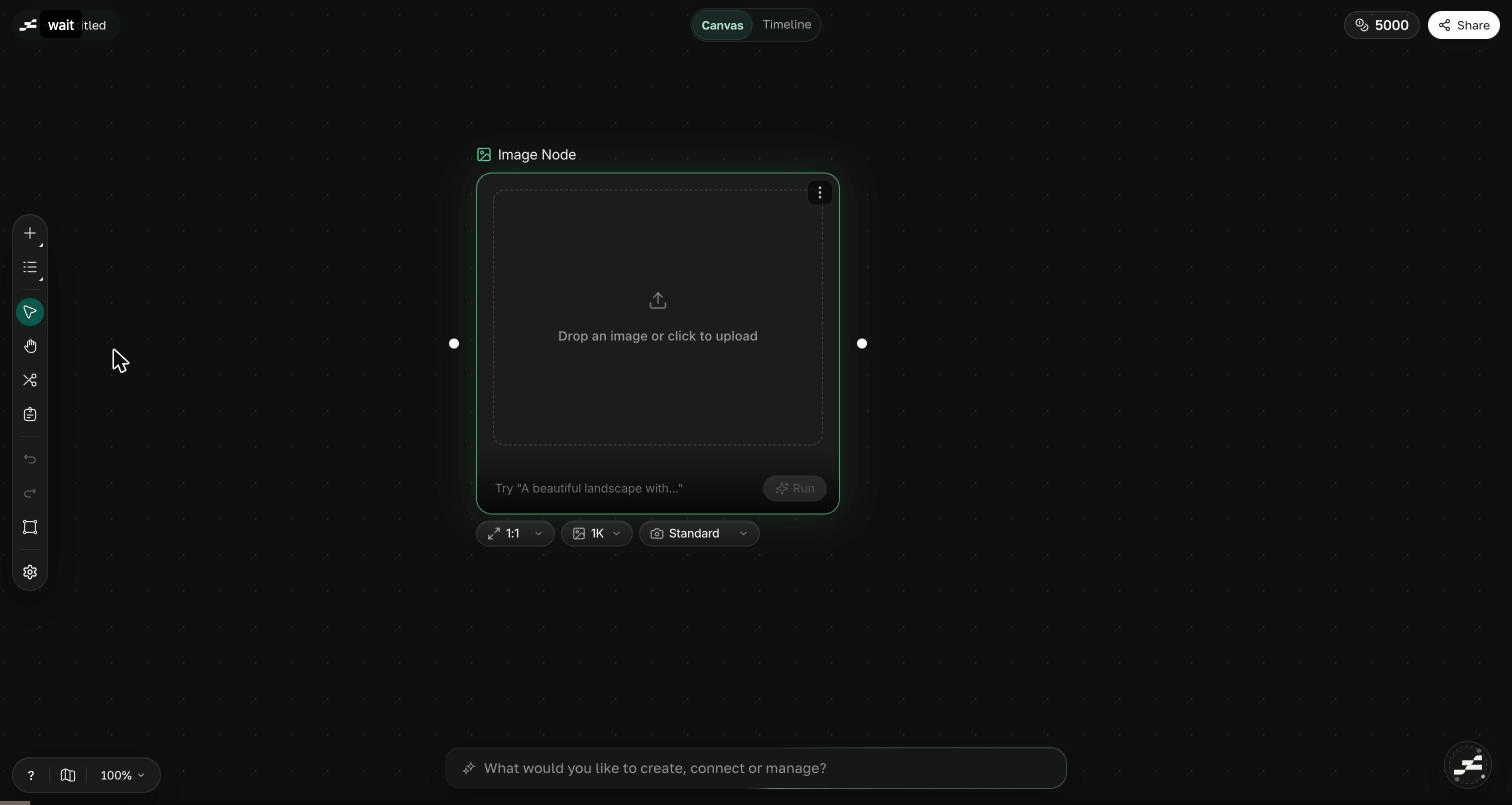
An Image node, showing its header, content area, side connection handles, and prompt-and-Run footer
Add a node
Click the + button in the left toolbar to open the add-node menu. Generate lists the AI node types, Tools lists the image tools, and Libraries holds Upload and Asset Library for bringing your own files onto the canvas. The menu is searchable, and most entries have a shortcut so you can drop a node without opening it at all: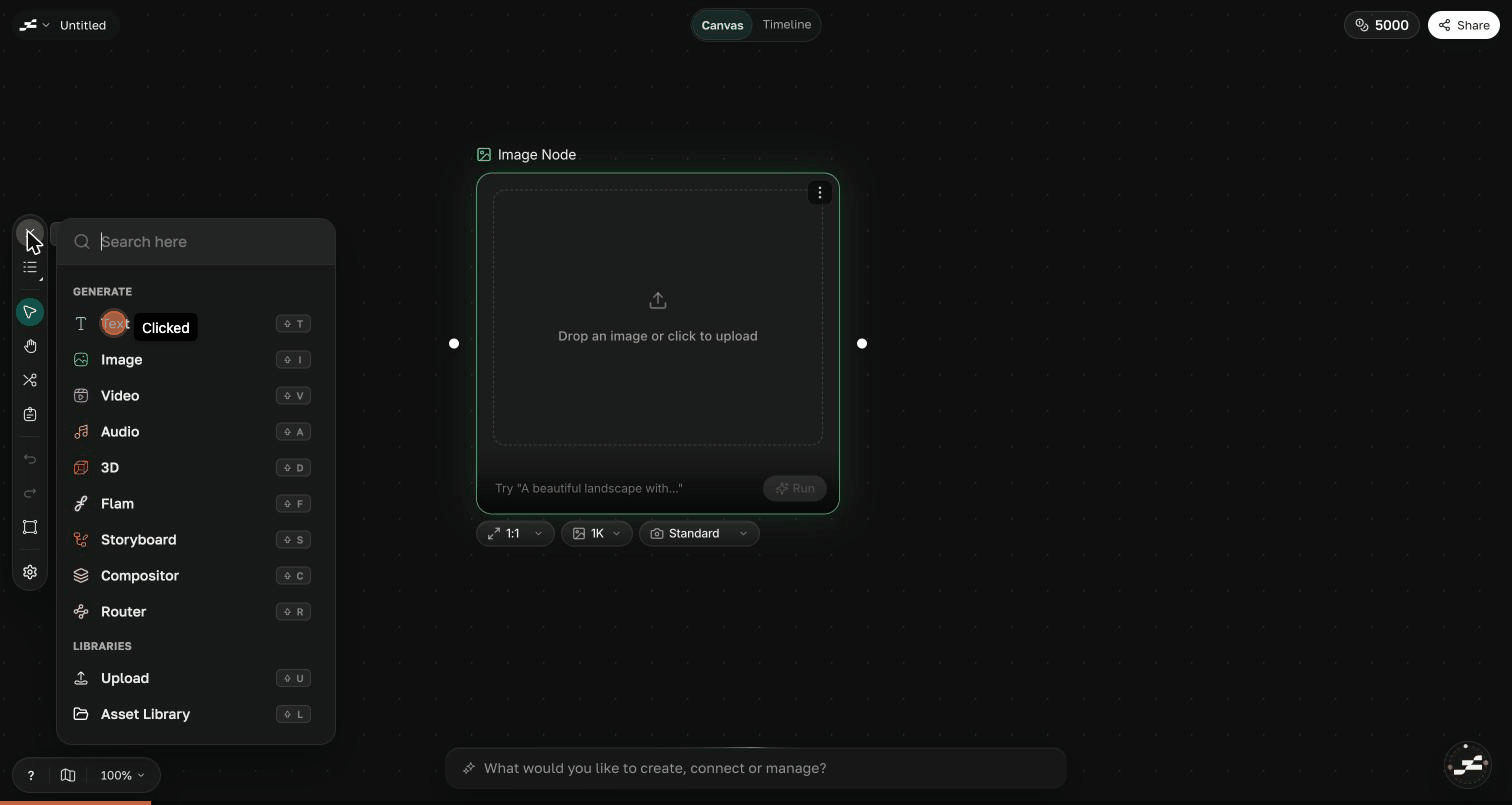
The add-node menu, opened from the + button in the left toolbar
Connect nodes
Each node has an input handle on its left edge and an output handle on its right. Click and drag from an output handle to another node’s input handle — a curved edge appears, and the source now feeds the target.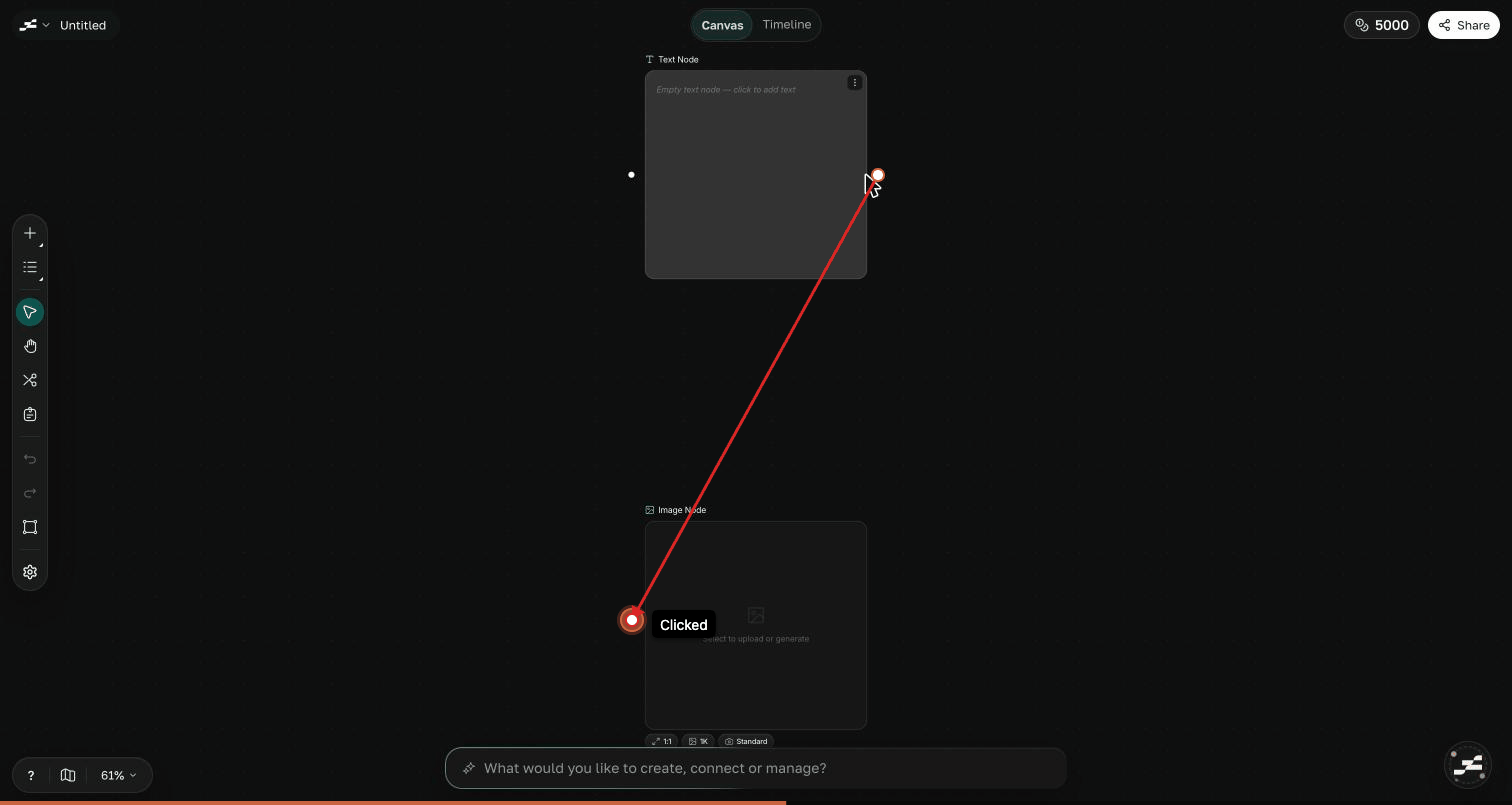
Dragging from a Text node's output handle to an Image node's input handle
Run a generation
Write a prompt in the node’s prompt bar and click Run. The node shows its progress, and when the generation finishes the result appears in the content area — the node is auto-named from your prompt so your canvas stays readable.How outputs feed inputs
Connections are how context flows. Everything wired into a node becomes material for its next run: connect Text → Image and the text drives the image prompt; connect Image → Video and the image conditions the clip; connect Audio → Composition and the sound lands on the timeline. Each node type accepts specific inputs and produces specific outputs — the radial menu only ever offers compatible types, so you can’t wire something a node can’t use.Node types
Text
Prompts, scripts, and notes that feed every other node.
Image
Generate stills up to 4K, with references and photobooth mode.
Video
AI video clips with two engines: Default and Compose.
Audio
Sound effects, music, and voiceover from a prompt.
3D
3D models from images and text, with a built-in orbit viewer.
Vector
SVG graphics — generate from text or vectorize an image.
Flam
Alpha-channel motion clips you can composite over anything.
Storyboard
Scene-by-scene plans with a story bible, fanned out to nodes.
Composition
A layered timeline inside the canvas that opens in Studio.
Utility nodes
Router, Group, Sticky Note, Brand Kit, and Model nodes.